Water Rocket Bottle Coupler (also known as a "Tornado tube")
Introduction:
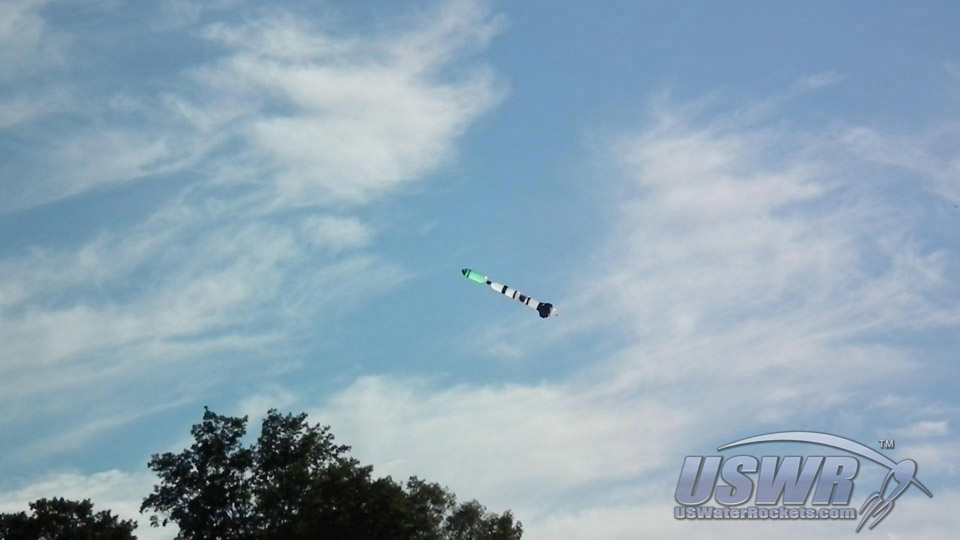
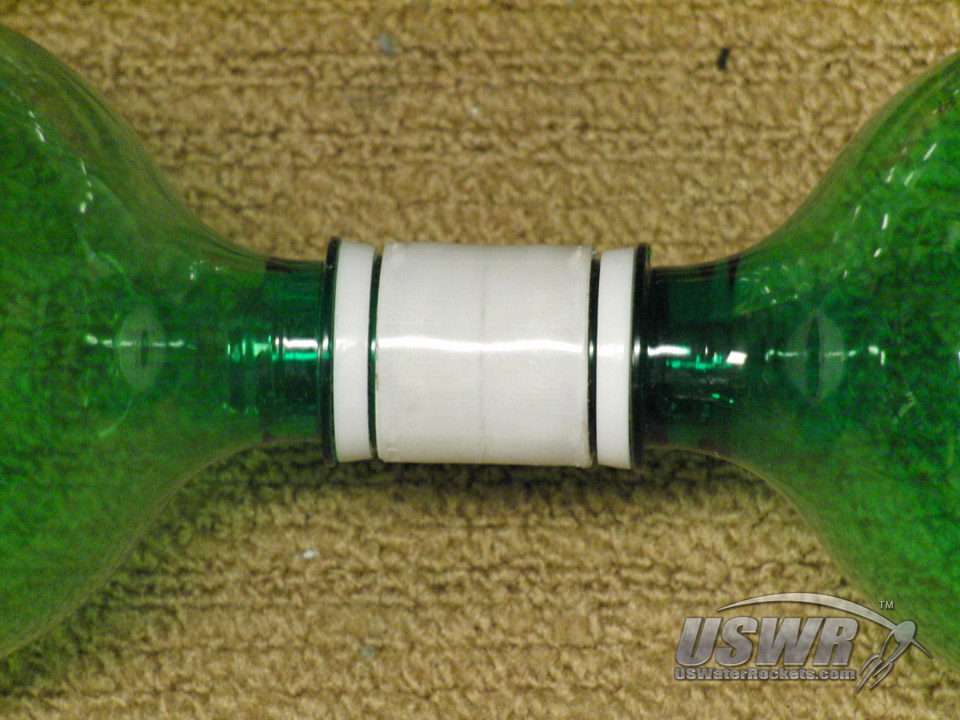
This tutorial will show a method for creating inter-bottle connectors which can be used to join together multiple bottles by the threaded necks. This type of bottle connector is generally used when making large volume or extended length water rockets like some of the rockets you may have seen in our YouTube Videos. Many teams build their rockets in this manner using a pre-manufactured commercial product used in school science experiments commonly called a "Tornado Tube" or a "Vortex Bottle Connector". The commercial versions typically cost $1.00US to $2.00US each. This tutorial will show how to make them for pennies each and without the expense and time consuming process of turning them on a lathe. This method could also be applied to other size bottles such as the wide mouth bottles that sports drinks often are supplied in. These bottle connectors are useful for Water Rockets because they allow for a modular approach to be applied to your rocket design, which simplifies construction and repair of a damaged rocket.With a module rocket, construction effort is reduced because it can be built in sections screwed together with these connectors as opposed to one contiguous rocket made from multiple spliced bottle sections. In the module design, each module can be built and tested individually and if one happens to be defective you have not wasted the entire rocket because you simply replace the faulty module. This holds true if the rocket ever becomes stressed or damaged as well, where bad modules are replaced instead of scrapping the entire rocket for one damaged area.
Tools and Materials Required:
-
Materials Required:
- Soft Drink Bottles.
- "All Plastics" type Super Glue.
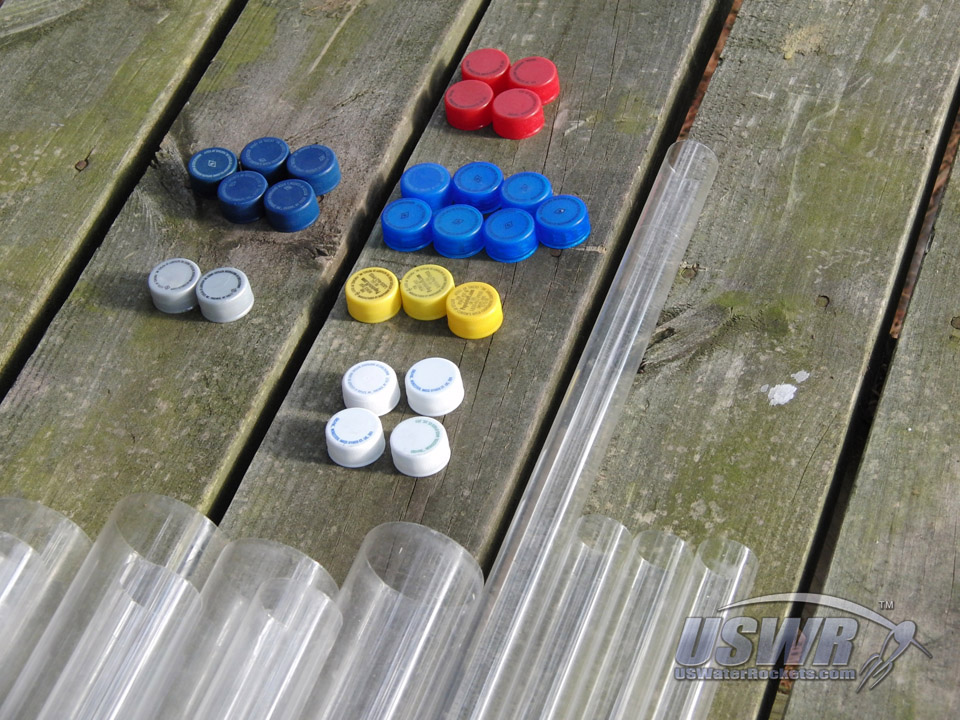
- Bottle Caps
- T-8 Fluorescent Tube Cover.
-
Tools Required:
- Scissors.
- 3/4" Drill Bit or Hole Saw.
- Rubber Gloves.
- Safety Glasses.
- Sharp Knife.
Step 1: Prepare the components for glue:
Use your sandpaper to roughen up the surface of our bottle caps to increase the bonding strength of the glue joints. Be sure to roughen up the entire outside surface of your bottle caps, including the sides. You will also want to scuff up the inside of your T-8 FTC a bit as you will be gluing the inside of the FTC as well.Before you go any further you should wash the caps in a strong detergent to make sure any soda and oils from your fingers are removed. You can also wipe them down with rubbing alcohol after you wash them to remove any other residue that the detergent couldn't remove such are sticky glues from labels or price stickers.
Gallery
Step 2: Cut sleeves from T-8 Fluorescent Tube Cover:
Make a sleeve from the T-8 FTC that is twice as long as each cap is tall. A simple way to do this is to stuff a pair of caps inside the tube together and trim off the overhanging ends of the FTC tube and then push the caps out of the resulting cylinder of sleeve. ...Step 3: Apply Glue Activator:
The glue we are using is specifically designed to work on Polypropylene and Polyethylene plastic, which is the type of plastic which the bottle caps are made from. If you refer back to our initial report on this glue, you will see how to identify these kinds of plastics. The glue we discovered is a two part glue which consists of a primer activator and a CA glue that is applied after the primer has evaporated. We used the Loctite brand glue for our tutorial here because the primer comes in a felt-tip pen applicator, which can be closed and reused multiple times.The super-glue brand adhesive come with 2 vials of primer activator and these cannot be closed once opened, plus the adhesive part comes in a gel form which is great for some applications but we did not think it would flow as well as the less viscous loctite brand, so we did not use the gel.
Apply the primer to the sanded surfaces of your caps and allow it to evaporate as instructed on the glue package.
Gallery
Step 4: Apply the CA Glue:
After the primer has fully evaporated, we apply the CA adhesive to one of your caps, coating the sides and top of the cap with a thin layer of adhesive. You then slide the cut section of FTC over the cap and push the cap all the way flush with the end of the FTC. Make sure the threaded side of the cap is facing outwards before the glue starts to set because you will have a few seconds to correct any mistakes. The other cap is quickly coated with glue and slid in the opposite end of the FTC with the threads facing the opposite direction. You should clamp or press the caps tightly together while the glue to cures to full strength.Tip: screwing a cap onto a scrap bottle before applying the glue to the outside allows the bottle to act as a "handle" so you can pick up the caps and push them in without touching the glue or getting it on your fingers or tools. Feel free to use this method as it will save you a lot of headaches.
Step 5: Drill the Caps:
Once the glue is cured, you will take a drill or a hole saw and cut a hole through the center of the bottle caps to allow air to pass through the connector. We used a hole saw for our holes because the center drill in the saw was very easy to center on the end of the bottle caps and get a perfectly centered hole through the middle without wandering off center. Since we use the built-in seal on the bottle caps in place of an o-ring, we wanted to be sure our holes were centered.Finish:
We waited 48 hours for the plastic glue to fully cure and then decided to give the couplers a good pressure test, just to make sure that they would hold up. We built a little test rig to pressurize a pair of bottles coupled with one of our custom built bottle couplers. The rig consisted of a spliced bottle with two female ends and a cap with a Schrader valve on one end. The opposite end connected to a second bottle with one of our couplers and the whole system was filled with water as a safety precaution before pressure testing.By filling the setup with water, there is little air space inside the test rig and if something fails there will be less energy contained inside to cause harm in the event of a failure. Only compressed air inside the rig can store energy, so the incompressible water will take up room and reduce the available kinetic energy storage space, making the test much safer.
We pressurized the rig to 130PSI and left it there for 30 minutes. No water leaked out of the coupler and the pressure remained at 130 the entire time, so we concluded that the couplers passed the test with flying colors.
Gallery
 Water Rocket Bottle Coupler Tutorial by
U.S. Water Rockets is licensed under a Creative Commons Attribution-NonCommercial 3.0 Unported License.


