How to splice multiple bottles together to construct a water rocket
Introduction:
In order to create larger Water Rockets with bigger pressure chambers than afforded by typical soft drink bottles, many enthusiasts have resorted to joining multiple bottles together using various methods which all are commonly referred to as "splicing".There are many traditional forms of splicing, dating back well over 10 years. The various methods have largely remained unaltered since their first appearance, except for a few minor evolutionary tweaks made over time. Until now, there has been very little research and testing into what failure modes can lead to splice breakdown, and how the traditional methods can be improved and modernized to improve splices.
After a research project lasting several months, U.S. Water Rockets has developed a radical new splicing method employing the results obtained by this investigation. The new technique is known as the U.S. Water Rockets Slip Joint Splice.
This tutorial will show you how to use this new method to create perfect splices that are easier to create and outperform traditional splices in both strength and appearance.
Tools and Materials Required:
-
Materials Required:
- 2 or more bottles of the same diameter with smooth, straight sides
- Mineral Spirits
- PL Premium Construction Adhesive
- Duct Tape
- Water
- Paper Towels
- Newspaper or cardboard
-
Tools Required:
- Scissors
- Rubber gloves
- 100 grit sandpaper
- Flat bottomed pan or skillet with a heat source (stove, microwave, etc.)
- Launch Tube (or similar straight rod)
Step 1: Preparing the Bottles:
Before you begin you must remove the labels and clean your bottles using the methods described in the Bottle Preparation Tutorial.You will first need to cut the bottom off your bottles. Most bottles will have a mold line along the bottle bottom where the sides join the foot area of the bottle. This line makes an excellent cut line to remove the bottom of the bottle. If you want to make your own cut line, follow the line drawing steps in the Bottle Cutting Tutorial
To make the cut easier to get right, you will roughly cut off the scrap foot area of each bottle about 1/4 inch from the cut line. Just chop off the scrap portion of the bottles and discard it, taking care to avoid cutting close to the cut line.
Gallery
Step 2: Making the final cut:
Carefully cut each bottle along the cut line. It will be easier if you cut the side of the bottle away from your body while looking through or over the bottle. Cutting this way allows the top scissors blade to clear the removed portion of the bottle and will not rub or interfere with the blade as you cut.Inspect each cut to insure that there are no jagged edges or burrs in the cut and trim them off if needed.
Gallery
Step 3: Preparing the shrinking bath:
The Slip Joint Splice has one bottle which will become the female side of the splice and one side which will become the male side of the splice. To create a male side that fits into the female side, you must shrink the cut edge of the male bottle very slightly so it fits inside of the female. To form a perfectly shrunken male bottle you will fill a flat bottomed pan or skillet with fresh water to a depth of 0.5 inches, then you will heat the water until it reaches 160 degrees Fahrenheit. You can do this on a stovetop or using a frying pan. You can even use a microwave oven if you want.Gallery
Step 4: Shrinking the male:
Stand one bottle in the hot water with the cut edge resting on the bottom of the pan. Leave it there for 1 or 2 seconds and then remove the bottle from the hot bath. The hot water will cause the bottle to shrink a very small amount where it was in contact.Test fit the male bottle into the female bottle. If it will not fit, try shrinking it once more. Different bottles shrink at different rates, so continue shrinking the male bottle until it just fits into the female bottle. The male should fit very snugly, but not kink or warp. The fit should be tight enough that you have to pull hard to separate the bottles. If the fit is loose at all, then you have shrunken the bottle too much and it must be discarded or recycled (cut the shrunken part off and try again).
Gallery
Step 5: Sanding the joint:
Using 100 grit sandpaper, sand the overlapping edge portions of the male and female bottles in the direction parallel to the cut edges. Sand the bottles all the way around, taking care to get the sanded surface down into the recessed area that often forms at the vertical seams of the bottles.Many people assume that sanding creates a rough surface that helps adhesives by increasing friction at the joint. This is very true, but in reality the sanding also breaks chemical bonds in the polymers that make up the plastic and this changes the chemical properties of the plastic surface to bond more readily with adhesives at the molecular level. Therefore, this step is critical to a good joint. Take your time and do it well.
Gallery
Step 6: Preparing to glue the splice:
Before you start using PL Premium Construction Adhesive, make sure that you protect your work area with newspapers, drop cloth, or cardboard, etc. Also be sure to wear rubber gloves to protect your skin from the PL glue, because it is very hard to remove from skin. Finally, be sure to open a window or use a ventilation fan to clear out the glue fumes, which are dangerous to breathe.Gallery
Step 7: Less is more:
Using a small stick as an applicator, start dispensing a tiny amount of PL Premium onto the sanded area of the female bottle. Apply a paper thin coating to the sanded area and smooth it out so there are no gaps or bubbles and there are few blobs or thick splotches of PL Premium.Gallery
Step 8: Less is still more:
Resist the temptation to slobber PL Premium all over the joint and repeat the application of PL Premium on the male side of the joint. You only need enough to cover the overlapping area of the bottles and the rest will be wasted or will end up inside the bottles where it will become dead weight holding back your rocket from reaching maximum potential.Gallery
Step 9: Mating the bottles:
Carefully slide the male bottle end inside the female bottle end. It should be difficult, but as the PL Premium is pushed aside the bottles will mate together. Press them firmly together. The bottles will likely overlap slightly more than 1/2 inch at the joint if done right. Wipe off any excess PL Premium which was squeezed onto the outside of the joint, and clean off any PL on the exterior of the bottles using Mineral Spirits.Gallery
Step 10: Aligning the bottles:
Slide your launch tube or some similar straight rod or pipe into the two bottles through the mouth opening. This will force the bottles to become perfectly aligned along the centerline of the bottles, which will make your rocket perfectly straight.Gallery
Step 11: Making a good impression:
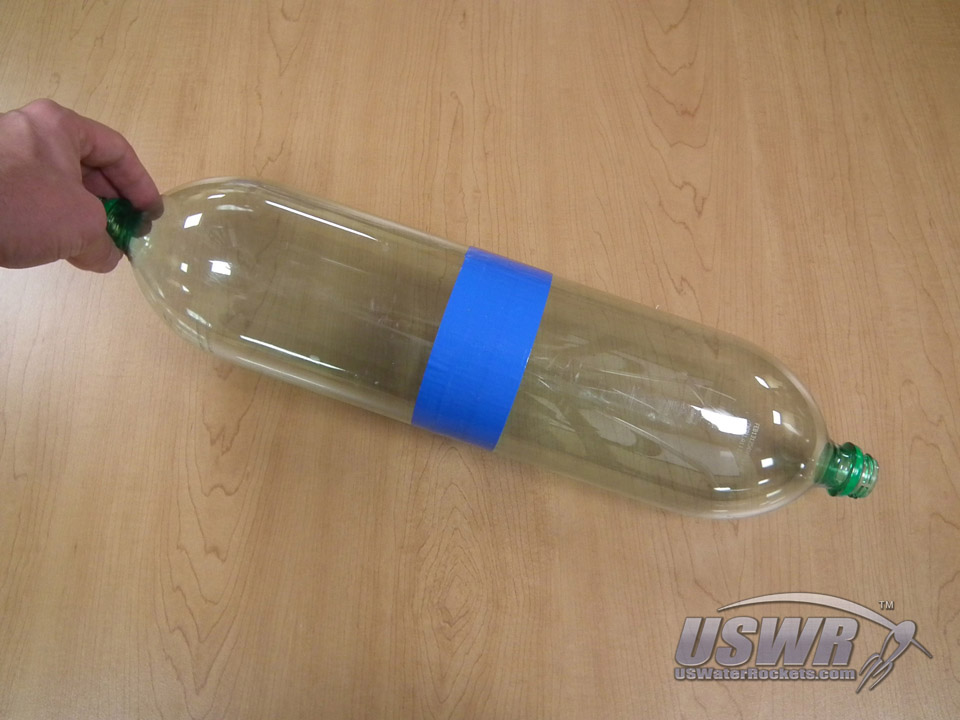
Wait a week or so for the PL Premium to fully cure before working on the bottles. When cured you can remove the launch tube or rod and inspect your work. You should have a very clean joint with no air bubbles and an almost invisible amount of PL inside. The Slip Joint Splice is attractive enough as it is when compared to the "dipped in peanut butter" appearance of traditional splices, but we can dress to impress and add some extra strength to the splice as well.Take a roll of Duct Tape (which comes in various colors and patterns which can compliment your rocket) and neatly wrap a strip of tape around the circumference of the splice, centered over the spliced area. Overlap the ends of the tape about 1 or 2 inches and cut the tape and press it firmly onto the bottles. The finished joint looks great and has a small amount of added strength thanks to the Duct Tape.
Gallery
Finish:
The U.S. Water Rockets Slip Joint Splice has been pressure tested on various sizes and diameter bottles and the results show that the bottle material will become distorted and distended at a lower pressure than the joint will fail, so the maximum pressure of the joint is well above the pressure the bottles themselves can survive.We have tested these joints through multiple launches, intentional crashes, and even manually crushing the joints before inflating the crushed bottles and then testing to bottle failure.
We're pleased to present to the community our improved splicing design, which is easier to make, uses less materials, looks better, and consumes less time than traditional splicing methods.
We hope everyone finds this research project useful and if you do, give us a shout out and send us your pictures and video links.
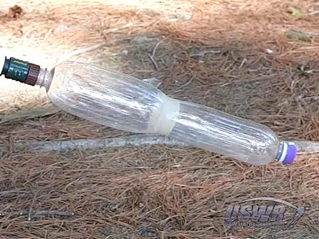
Watch the video below and see that the splice is stronger than the bottles!
Gallery
 Water Rocket Slip Joint Bottle Splicing Technique by
U.S. Water Rockets is licensed under a Creative Commons Attribution-NonCommercial 3.0 Unported License.


